


How to Resolve WiFi Issues after Windows 10 Upgrade
Windows 10 free upgrade is coming to an end. This has triggered a lot of Windows 10 upgrades and activations. Most of the upgrades are not a clean install of Windows, but an upgrade for eligible customers upgrading from Windows 7 and Windows 8.1. With every upgrade or a dirty install comes its own set of problems. In this post I am going to talk about How to Fix WiFi Issues after Windows 10 Upgrade.
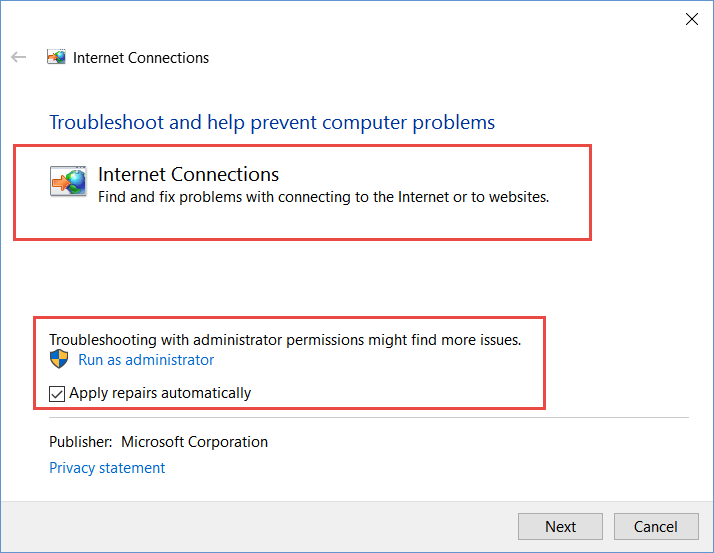
Step 1: Run the Network troubleshooter
This checks the following :
- The Internet Connectivity (Checks microsoft.com by default)
- Functionality of the Network Adapter
- Whether the device drivers are available.
- Device is enabled.
Run the following steps below:


- Go-to Start and Search “troubleshooter” (Alternatively: Press Windows + X Select Control PanelAll Control Panel ItemsTroubleshooting)
- Type troubleshooter in the search box, and select(Click) “Troubleshooting”
- Go Under Network and Internet (See Screenshot), click on “Connect to the Internet”

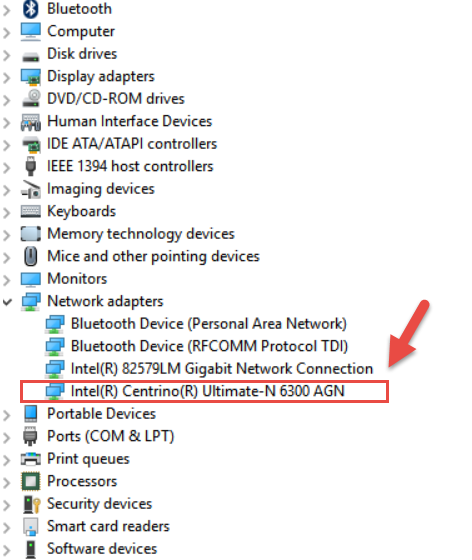
Step 2: Check Device Manager for Driver Issues
Press Windows + X>Device Manager> Network Adapters

Step 3: Remove Wifi Profiles of the problem Networks
Click to Open “Command Prompt” and Enter the following command and see the existing list of Wifi network profiles.
netsh wlan show profiles
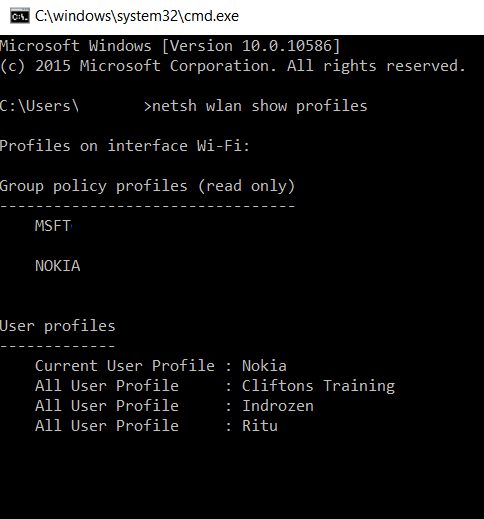

As you can see, if you are using an Enterprise Edition, some profiles are managed by “Group Policy” and are managed by your Company IT. However, you can delete the User Profiles. Let’s say for example, after upgrading to Windows 10, the older network is not visible in the list of available WiFi. It should be visible in here and you can go ahead and delete it so that it shows up after refresh.
Issue the following command to delete the profile.
netsh wlan delete profile name="Nokia"
Next Step is to delete the profile from the Windows Registry.
Press Windows+X>Run> Type regedit > Say “Yes” to Run as Administrator.
Navigate to the location given below (Screenshot):
HKEY_LOCAL_MACHINESOFTWAREMicrosoftWindows NTCurrentVersionNetworkListProfiles
Delete “Nokia” (Right Hand Side) from the List as seen in the Screenshot:


This should remove your existing network and you can refresh to see if your home network shows up in the list of available WiFi networks.